Tuesday, December 21, 2010

Merry Christmas!


To prove I haven't fallen off the face of the earth, I'm popping back in to with everyone a safe and Merry Christmas filled with joy, blessings, and love.  Things are going along pretty smoothly here in Wedding Planning Land, and I can hardly believe that as of today we only have 25 days left until the wedding.  TWENTY-FIVE!!! :)  I do plan to make a return once we're settled in post-wedding, so be on the look out!  Until then, best wishes to all of you!
Photobucket

Monday, October 11, 2010

See You on the Other Side of the Rainbow

Hello, sweet readers! Remember me? I’ve been taking a break from blogging, and during that time I had a long and hard discussion with myself about whether or not I’d like to resume blogging after my little hiatus. I know, I know—Kitchen Koala just celebrated its 3rd birthday with a giveaway and a layout makeover...but things have changed in the past 8 months. I’ve changed over the last 8 months. I could go on and on with a million excuses, but here’s the long and short of it: 

  • As you may already know, I am employed in the oil industry. Our little company finally felt the effects of the drilling moratorium (thank you, Mr. President), and recent layoffs in my department has led to a shift in my day-to-day responsibilities. Whereas my typical day used to be about 80% lab work and 20% computer work, my job load now has shifted more towards the 20:80 ratio. My days are spent primarily at my desk, staring at the computer screen and processing data. Unfortunately, what this translates to is my non-desire to sit down and tinker with photo editing and blogging when I punch out of work.

  • I met someone so wonderful, that not only am I going to marry him in 3 months, I want to spend all my time with him. Every. Single. Waking. Moment. (yeah, yeah. Gag.) Between the wedding planning and DIY wedding crafts, there’s not much time for baking. *sad face*

  • I love food.  Love, LOVE, LOVE it.  I love looking at it, reading about it, making it, and EATING IT.  Me and Food?  Best friends.  But...I need to step away from baking. At least for now. My clothes no longer fit, and getting dressed most days can be a guessing game. BUT-- I’m perfectly happy self-esteem wise. In fact, I’ve never been happier. The fact of the matter is: I cannot afford an entire new wardrobe. ‘Blogger 15?’ Um...no. Try ‘Blogger 45.’ Yikes. Something’s gotta change, and I’m starting by channeling my creative energies into non-edible craftywork. (Hello yarn, remember me?)

And so it is with a heavy heart that I bid you all farewell, if only temporarily. Thanks to all my readers, followers, and faithful commenters. I’ve truly enjoyed hearing from each and every one of you, not to mention getting to know you through your blogs as well. It’s been a great run, but don’t count me out completely. The blog will remain open, and I may pay you all a visit from time to time. 

Photobucket

Friday, August 27, 2010

Blogoversary Celebration! (And GIVEAWAY WINNER!!!)


When I started this blog in 2007 under the name "Fuzzykoala's Caketastic™ Adventures," I had no idea how much I would fall in love with the food blogging community.  (Heck, I didn't even know such a vast community even existed!)  Through various cooking groups and contests, I've been introduced to so many wonderful and kind fellow bakers/cooks.  The level of talent out there is astounding--in the kitchen, behind the camera, or at the keyboard penning amazing narratives!  Their blogs have provided a continual source of inspiration for growth as well as a treasure trove of "must try" recipes.  (Don't believe me?  Check out a few of the ones listed on my Blogroll.)

Overall, it's been a wonderful (and delicious!) journey filled with great learning experiences and the occasional kitchen disaster.  As we celebrate this blog's 3rd birthday, let's take a look back at Kitchen Koala through the years:


August 2007:  The original design, chosen from one of Blogger's standard templates. 
A close friend always joked that my bakery name (should I ever open one) could be The Fuzzykoala Cake Company.  Thus was born the address http://fuzzykoalacakecompany.blogspot.com , where "Fuzzykoala's Caketastic™ Adventures" could be found for the next three years.


Later that year:  Another standard Blogger template.  Blog tweaks and HTML edits were still too scary for me to even think about.


Sometime in 2008:  I got brave and decided to shell out a few bucks for a custom blog design.  This one is courtesy of Delicious Design Studio. 


October 2009:  Hours of tinkering with Photoshop and editing HTML codes resulted in a blog design I could truly call my own.  It was cute, sweet, and frilly.

January 2010:  I dropped the long name and blog address and adopted a newer, simpler one: Kitchen Koala.  The switch from a .blogspot address to a .net was easy, and now I had an e-mail address and Twitter user name to match.  (Note: I don't currently use Twitter, but I signed up to snatch up the name...you know, in case I decide to use later)


August 27, 2010: Kitchen Koala turns 3!
Blogger's new Template Designer had so many great options that I couldn't not give the ole' blog a facelift.  The new look is cleaner, fresher, and happier!


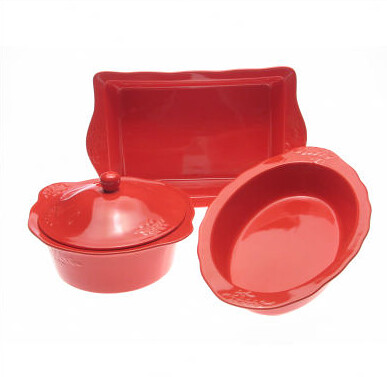
Okay...enough about me.  Let's get on with what you REALLY came here for:  the results of the $40 CSN Stores Giveaway.

With 37 comments/entries plugged into the handy dandy Random Number Generator, the winner is...


Comment #10

Congratulations, Mariah Smile!
I'll be contacting you soon by e-mail for details on how to claim your prize.

Thanks to everyone for playing, and be looking forward to more good things as Kitchen Koala enters its fourth year!

Holey moley, do your eyes deceive? 
 
Of all the rainbow-colored desserts I've featured on the blog, I had yet to include poor, lowly INDIGO in any of them.  Until now. 
Congrats, Indigo Koala...it's your time to shine! :)

Tuesday, August 24, 2010

Friendship Cake: Day 20

Here's a look at how my Thirty Day Friendship Cake is doing:  


Day 20: August 19, 2010
Observations:
Pineapple bits have absorbed some of the sugar from the liquid and are no longer floating at the top.  Over the last 10 days, I'd been looking forward to the "The color should change, and the mixture should foam when stirred" part of the recipe...but this didn't happen.  A quick internet search revealed that I'm not the only one who didn't get foamage during days 10-20.  I'm disappointed, but I'm pressing on. 

Ingredients needed for Day 20:

  • two 10 ounce jars of maraschino cherries, undrained
  • 2½ cups sugar
Slice each cherry in half, and stir in. Add 2 ½ cups of the white sugar. Stir once every day for the final 10 days. The cherries will give the juice back its pinkish color.


And...now we wait.  Another 10 days.  

Need to catch up?
Friendship Fruit Starter
Friendship Cake: Days 1 & 10


Reminder:  You still have time to enter my $40 CSN Stores Giveaway!  Entry deadline is Thursday, August 26th at NOON Central Standard Time.  Entering is free, no strings attached.  You've got nothing to lose!

Friday, August 20, 2010

Peanut Butter Cup Ice Cream


At a family gathering back in May, my cousin J. oohed and aahed over the remarkable fact that the blueberry cheesecake ice cream I brought could be served straight from the freezer--no softening necessary!  She then challenged me to produce a peanut butter ice cream that would be perfectly scoopable right out of the freezer, something her brother (an avid ice cream making adventurer) could not (at that point) do.  Okay, so she didn't really "challenge" me so much as mention the fact that cousin P.'s last attempt at peanut butter ice cream--though tasty--was hard, hard, hard.  Mr. Koala and I took it upon ourselves to try and remedy that situation, and here is our result:

FAIL.

This peanut butter ice cream is insanely rich, peanut buttery, and decadent, yet suffers from the "I'm so hard I'll break your spoons if you try and dig into me right away" Syndrome.  No one was complaining, as the taste more than made up for the counter top wait time.  But that didn't solve the original "problem" we were trying to address.  Looks like some further experimentation is in order...  :)


Peanut Butter Cup Ice Cream  (Yield: about 1 quart)
Slightly modifed from Erin Cooks

2 eggs
¾ cup sugar
2 cups heavy cream
1 cup whole milk
1 cup creamy peanut butter
1 tsp. vanilla extract
9 peanut butter cups, chopped (it helps to refigerate them first)

Whisk the eggs in a mixing bowl until light and fluffy, about 2 minutes. Whisk in the sugar, a little at a time, then continue to whisk until completely blended, about 1 minute more. Pour in the heavy cream, milk, peanut butter, and vanilla.  Whisk to blend.  Refrigerate ice cream base until cold.  Churn according to your ice cream maker’s manufacturer instructions.  Meanwhile, place the chopped peanut butter cups in the freezer (this will keep them from breaking up too much when adding to the finished ice cream). When ice cream is almost ready, add peanut butter cups and allow the machine to mix them in.

Thursday, August 19, 2010

$40 CSN Stores Giveaway! ***CLOSED***

Sorry, kiddos--time's up!  Check back tomorrow (8/27/10) to see if you won!

Mr. Koala and I are counting down the days until our wedding: as of today, we have 149 days left (!).  As we look towards the future, I can't help but dream about the times we will share in the kitchen, baking away or preparing 'kitchen experiements' for dinner, then sitting down to share the meal.  At a real, grown-up table.  Our tableMy current living situation does not allow for much personal decorating or the purchasing of new furntiture, so you can imagine my excitement about getting (and decorating!) a home of our own.  Naturally, the first big furniture piece that comes to mind are kitchen tables.  How sweet would this be in our home?

farmhouse table

Or maybe a cozy little breakfast nook?

breakfast nook

Either way, I'm really looking forward to spending lots of time at the kitchen table with my future husband!  When we're ready to shop for our home, we'll be turning to the CSN Stores to browse their vast selection.  Comprised of 200+ stores, CSN Stores.com offers products such as furniture, home decor, housewares, home improvement, outdoor living items, baby & kids items, and even shoes & handbags!  Here are a few things on my "Want." list:

Adorably pink, peep toe patent pumps?  With ruffles?  Want. 
Pink Carlos shoe

Cubby hole book shelf?  Want.
book shelf

Beautifully colored baking dishes?  Want.
Pie+Dish+in+Sky

Want.
 'Bake+for+the+Cause'++9_+Pink+Pie+Dish

Want.
red bake set


You get the idea.  Ready to make a "Want." list of your own?  You've come to the right place, because CSN Stores has graciously offered to sponsor a $40 Gift Card Giveaway to one lucky Kitchen Koala reader!   With over 200 stores to choose from, it's going to be tough deciding how to spend that $40!


Entering is easy!  Here's what you need to do:
  • Visit THIS SITE
  • Come back here and leave me a comment telling me your favorite dining room set
  • Make sure to leave your e-mail address in your comment, or make sure your profile is public so I can contact you when you win!
  • Want an extra entry?  "Follow" the Kitchen Koala blog (see left sidebar under "Koala Friends"), then leave a separate comment telling me you're now a follower.  Already a follower?  Leave a comment letting me know that too!

Giveaway ends on Thursday, August 26th at 12:00 pm (noon!) CST. 
Open to U.S. and Canadian residents only. 
Maximum of 2 entries per person, please.  I'll be checking!
Winner will be selected by random draw and announced on Friday, August 27th.

Good luck to all! ♥


Tuesday, August 17, 2010

Because Everybody Loves Free Stuff.


Giveaway.

Coming soon.

Be sure to check back on Thursday for the giveaway announcement.  Kitchen Koala is turning 3, and I'm celebrating by giving YOU, dear readers, a chance to win a fabulous prize.  It'll be my first ever giveaway, and I'm totally excited!!! :)

Monday, August 16, 2010

Milk Chocolate Oatmeal Cookies


Today's recipe is straight from the back of the Nestlé® Milk Chocolate Morsels bag.  Whether you're in the "raisins, please" or "gimme chocolate, and bring it now!" Oatmeal Cookie Camp, you're sure to love these raisin and milk chocolate studded cookies.  There's a hint of cinnamon in there to tie it all together, but don't worry--this is definitely NOT a cinnamony cookie.  Though raisins are listed as an optional ingredient, I wholly recommend adding them.  I'm a raisin lover myself, but I think most everyone will appreciate their gentle sweetness against the rich milk chocolate.  (Which leaves me wondering how chocolate-covered raisins might fare in a cookie...)  I brought these cookies in to work, and my co-workers made fast work of them.  Of course, I didn't let on that there were raisins inside--and everyone loved "those oatmeal cookies with chocolate chips."


So where do you stand when it comes to oatmeal cookies?
- Raisins only?
- Raisins & lots of cinnamon? (my fave)
- Chocolate
- Something else?


Milk Chocolate Oatmeal Cookies (Yield: 3 dozen)
From the Nestlé® Kitchens

1 ¼ cups all-purpose flour
½ tsp baking powder
½ tsp baking soda
½ tsp ground cinnamon
¼ tsp salt
¾ cup (1 ½ sticks) butter or margarine, softened
¾ cup packed brown sugar

⅓ cup granulated sugar
1 ½ tsp vanilla extract
1 large egg
2 Tbl milk
1 ¾ cups (11.5-oz. pkg.) NESTLÉ® TOLL HOUSE® Milk Chocolate Morsels
1 cup quick or old-fashioned oats
½ cup raisins (optional)


Preheat oven to 375° F.

Combine flour, baking powder, baking soda, cinnamon and salt in small bowl. Beat butter, brown sugar, granulated sugar and vanilla extract in large mixer bowl until creamy. Beat in egg. Gradually beat in flour mixture and milk. Stir in morsels, oats and raisins. Drop by rounded tablespoon onto ungreased baking sheets.

Bake for 10 to 14 minutes or until edges are crisp but centers are still soft. Cool on baking sheets for 2 minutes; remove to wire racks to cool completely.

Friday, August 13, 2010

Thankful


Waaaay back in March I received this lovely group of blog awards from Alison of Just Like Grandma's, and since I was busy at the time I thanked her and promised to post & pass them along when I had time.  Fast forward five months later, and it turns out...I FORGOT.  Whoops.  My memory was jogged when I received this:


from Liza of The Smiths, my Domestic Dork's Valentine's Day Exchange partner.  I'm bending the rules a bit here, as I've shared lots of info with you already in previous award post.  So...I'll share 5 things about me and pass this award suite on to 5 others.

1.  I'm an "edge" person when it comes to brownies.  Gives me something to hold on to.  One edge only, so corners are out.
2.  I picked our wedding date (January 15th, 2011) *mostly* so I could have date that is the same backwards and fowards: 1-1-5-1-1.  Geeky? Yes. Don't judge :D
3.  If all my meals could be served in cafeteria-style trays, I'd be one happy gal.  (You know, no touching.)
4.  Rainbows (and rainbow-colored things in general) make me happy.  A peek into my closet would reveal t-shirts arranged in rainbow order.
5.  I have a thing about stickers.  As in, I like to hoard them and look at them...but not actually use them.  Though that may change now that Mr. Koala has given me THIS.


Now that I've given you some insight into my weird and quirky ways, check out the following blogs I'll be passing these awards to:

1. Jessica of How Sweet it is
2. Carrie of Cooking with Carrie
4. Sharlene of Small Town Oven
5. Lacy of Catholic Icing

Have a safe and wonderful weekend, every one!


Edit:
Aaaah! I inadvertently left out Kelly of Crouching Mother, Hidden Toddler for passing on the "Versatile Blogger" and "Sugar Doll Award" to me.  Sorry, Kelly! 

Thursday, August 12, 2010

Wicked Witch of the West Rum Raisin Ice Cream


Today marks the 71st anniversary of the premiere of my favorite movie of all time, The Wizard of Oz.  Happy Birthday!  :)

Let's celebrate with some obligatory cake and ice cream, shall we? 

Over the Rainbow Cake (read about it HERE)

And...

Ice cream.  Rum Raisin Ice Cream. 


But "why Wicked Witch of the West Rum Raisin Ice Cream," you ask? 
Let's take a look:

This is what happens to rum raisin ice cream when you eat nearly the entire tub of it, realize you haven't gotten a blog photo of it yet, then set the container holding "just barely enough to make a pretty scoop" on the counter to soften up a bit, log onto the computer...and get totally distracted by The INTERNET. 
(Or more specifically, Weddingbee.)


Remember way back when I promised I would tell you what I made with all those leftover egg yolks from the making of THIS cake?  Making a two-tiered white cake left me with 8 egg yolks just begging to be made into a sweet, choleseterol-laden something.  And that something just happened to be one of my favorite ice cream flavors: Rum Raisin.  I found a great recipe on Epicurious that requires a boat load* of egg yolks** for the custard.  How many is a boat load?  In this case, eight.  Now I know what you're thinking--"Holey moley!  EIGHT yolks!?!?"  Is it rich?  You betcha.  Worth it?  Aboslutely.  So without further ado, here ya go:


Rum Raisin Ice Cream  (Yields about 1.5 quarts)
From Epicurious

1 cup raisins, packed
cup dark rum

8 egg yolks
1 cup sugar
3 cups milk (use 2% or whole, please)
1 ½ cups whipping cream

Combine raisins and rum in small bowl. Cover and let stand at room temperature for 2 hours. Drain raisins, reserving 6 tablespoons rum. Combine in same bowl.  (Since I wanted to tone down the booziness of the ice cream, I brought the rum raisin mixture to a simmer to reduce and cook off some of the alcohol.)

Whisk egg yolks and sugar in a large bowl until blended. Bring milk and whipping cream to a boil in a heavy large saucepan over medium heat. Gradually whisk into yolk mixture. Return mixture to saucepan; stir over medium-low heat until custard thickens, about 15 minutes (do not boil). Strain custard into bowl. Cool. Add raisin mixture to custard. Refrigerate until cold.

Transfer custard to ice cream maker and process according to manufacturer's instructions. Freeze ice cream in covered container until firm, about 4 hours. (Can be prepared 3 days ahead.)

* not an actual boat-sized boat :)

 ** with that many egg yolks in the custard, you need to be really careful when cooking it or it's Curdle City for you, Buster!  If this happens to you, don't fret!  You'll be running the custard through a strainer or sieve before chilling it down.  Even if the texture looks like ricotta cheese, you won't notice any curdle-y-ness in the finished frozen product.  Promise!

Wednesday, August 11, 2010

Friendship Cake: Days 1 & 10

Okay...so where were we?  When we left off last time (a month ago?  Really?!?!  Posting has been neglected, as it's been wedding, wedding, WEDDING.  All. The. Time.  Sorry, Mr. Kitchen Koala.)  I assembled the Friendship Cake Starter and left it to do its thing for 21 days, stirring every few days.  During that time, the fruit infused itself into the liquor (and vice versa), leaving us with a mountain of deliciously boozy fruit and sugary sweet fruit brandy.  Let's take a look, shall we?


Time to drain!


You'll end up with about 2 cups of liquid (this is the starter for the Thirty Day Friendship Cake) and about 4 cups of brandied fruit (save this in the fridge for some yummy late-night snacking).


Place the liquid back into the jar...NOW we can finally start the 30-day process to make the actual cake.  Here's a recap of where I am now:  (Full recipe at bottom of post.)


Day One (07/31/10):
Begin by obtaining one 15 oz. can of peaches packed in juice (there'll be plenty of chances to add sugar later!).  If you can, seek out diced or chunked peaches to make things easier.  If the peaches are sliced, go ahead and use your kitchen scissors to chop them up as you add them to the starter liquid.   Add 2½ cups white sugar.  Stir daily.  The sugar won't all dissolve right now, but that's okay--it will over the course of the next 10 days.


Day Ten (08/09/10):
Add one 15 oz. can of pineapple packed in juice.  Uh oh.  Looks like all the big cans of pineapple are now 20 oz.  Go ahead and eat some, no one's looking.  Again, smaller pieces are your friends here, so seek out the pineapple tidbits.  If you've only got chunks, slice each one in half.  Add pineapple along with all the juices to the jar.  Throw in ½ cup white sugar and stir daily.

 Whoops.  I cannot for the life of me get this photo to post in the correct orientation. 


Be sure to tune in next week as we look at Day Twenty (08/19/10)!


Thirty Day Friendship Cake (two 9x13 inch cakes or two Bundts)
From Allrecipes.com

This takes 30 days to prepare the fruit for the cake but it's worth it.  It's delicious.  If you are lucky a friend will give you 2 cups of starter along with a piece of cake so you won't have to go through all the trouble of preparing a starter.  If you have the starter, begin here.  If not, it will take an additional 20 days to prepare the starter.  Get the starter recipe HERE or HERE.

2 cups Friendship Fruit Starter
1 (15 oz.) can sliced peaches in juice, undrained
2 ½ cups white sugar

1 (15 oz.) can pineapple chunks in juice, undrained 
½ cup white sugar

2 (10 oz.) jars maraschino cherries, undrained
2 ½ cups white sugar

2 (18.25 oz.) boxes yellow cake mix
2 (3.4 oz.) boxes instant vanilla pudding mix
1 cups vegetable oil
8 eggs
2 cups golden raisins
2 cups chopped walnuts
2 cups flaked coconut


Day One:
In a large glass jar or bowl, combine 2 cups of the starter with 1 can of the sliced peaches and their juice (each slice chopped into 4 pieces).  Add 2½ cups of the white sugar and stir once every day for 10 days.  When not stirring mixture, keep it covered with a paper towel, foil, or a loose lid.  Let sit at room temperature.  Don't refrigerate it or cover it airtight.  A pan of water underneath the jar or bowl will keep the ants out.

Day Ten:
Add 1 can of chunk pineapple and its juice.  Cut each chunk of pineapple in half.  Stir in ½ cup white sugar.  Stir once every day for 10 days.  The color should change, and the mixture should foam when stirred.  (So far, this has not happened for me...but I'm still pressing onward!)

Day Twenty:
Slice each cherry in half, and stir in.  Add 2 ½ cups of the white sugar.  Stir once every day for the final 10 days.  The cherries will give the juice back its pinkish color.

Day Thirty:
Drain the fruit and reserve it and the liquid.  The fruit will be used to bake the cakes; the liquid is the starter for the next 30-day cycle.  Pour the liquid into 3 glass or ceramic pint jars-one for you to keep & start the next cycle, and two to give away to friends.  Cycle must be started within 3 days of receiving the starter, or you should freeze the starter to use at a later date.  Do not use plastic or metal containers to store liquid.

Bake the cakes:
Preheat oven to 325°F.  Grease and flour two 9x13 inch baking pans or two Bundt pans (or one of each!).

It's best to mix the two cakes separately, unless you have a ginormous bowl.  Combine 1 box of the cake mix, 1 box of the instant vanilla pudding, ⅔ cup of the vegetable oil, and 4 of the eggs.  Stir, then add half of the drained reserved fruit from the starter (fruit only, not the starter liquid).  Stir, then add 1 cup golden raisins, 1 cup chopped walnuts, and 1 cup flaked coconut.  Stir until all ingredients are combined.  The batter will be stiff.  Pour batter into the prepared cake pan.  Repeat for cake number two.

Bake cakes at 325°F for 55 to 65 minutes.  Bundt pans may take 70 minutes or longer.

Hashbrown Egg Breakfast Casserole


Confession:  I have never prepared REAL bacon. 

Sure, I've cooked up lots 'o turkey 'bacon' and that pre-cooked microwavable stuff, but never any honest-to-goodness, pork fatty bacon.  I've watched my mom do it, and I've seen it done plenty of times by others (both in real life, and on TV)...but somehow I never worked up the courage to do it on my own.  It might have something to do with my fear of hot, splattery oil (this is the gal who's terrified of deep fat frying, remember?).  But then I saw THIS RECIPE for Hashbrown Egg Breakfast Casserole* over at Cooking with Carrie.  And somehow it didn't seem right to make it with anything other than the real deal.  Which could only mean one thing: time to put on my Big Girl Pants and fry some up! 

As it turns out, frying bacon wasn't so bad after all.  This may or may not be a good thing.  Only time (and my pant size) will tell...

*I went ahead and made the executive decision to throw in a handful of chopped green onions to add a splash of color and flavor to the dish.  Bad idea.  The casserole was good, but could've been better had I left out all those onions!

Tuesday, July 13, 2010

Friendship Cake: The Starter

Yesterday I shared the Amish Friendship Bread recipe with you, and if you managed to make it through the entire post, "Thank You" for sticking by me.  During my 10-day wait for the Amish Friendship Bread Starter, I did a bit of digging around and came across another interesting entity: the Thirty Day Friendship Cake.  The name alone was enough to pique  my interest, not to mention how much less I was grossed out by the ingredients/process compared to the Amish Friendship Bread.  The flour-sugar-milk mixture I so disdainfully squished every day is replaced with a much tastier looking blend of brandy, sugar, and canned fruits.  Brandied fruit?!?!  Yes, please.

The starter for the cake is a sugary fruit-infused brandy, making the resulting cake (which contains pineapple, peaches, cherries, raisins, nuts, and coconut) a "Fruitcake in Disguise."  And I do love me some fruitcake!  The only downside of this recipe is the wait time:  30 days if you have access to a starter, or 50 days if you're starting from scratch.  The Friendship Fruit Starter takes 21 days to make, and Day 21 of the starter will become Day 1 of the Thirty Day Friendship Cake.  Make sense?  I won't overwhelm you with both recipes today, so only the Friendship Fruit Starter will be posted below.  Will you journey with me? 

Let's begin:


Friendship Fruit Starter 
Original Recipe Yield: 2 cups starter, 6 cups brandied fruit
From Allrecipes.com

15 oz. can pineapple chunks, drained (I could only find 20 oz. cans, so I *might* have eaten the extras)
15 oz. can aprioct halves, drained
15 oz. can sliced peaches, drained
10 oz. jar maraschino cherries, drained
1¼ cups brandy
1¼ cups white sugar

In a large glass jar (I used a 1-gallon jar, but a ½ gallon should do), combine drained pineapple chunks, drained apricot halves, drained sliced peaches, drained maraschino cherries, brandy, and sugar.  Stir gently with a wooden spoon.  Cover loosely (set lid on top but do not screw it down) and let stand at room temperature for 3 weeks, stirring at least twice a week.  Drain and reserve the liquid- This liquid is your starter for the Thirty Day Friendship Cake.  Fruit may be kept in the refrigerator for another use; you will be using new fruits to make the Thirty Day Friendship Cake.


So there you have it friends.  Seems easy enough, right?  I'll keep you posted on the progress of the starter...probably on Day 10 and Day 21.  Are you as excited as I am???

Monday, July 12, 2010

Amish Friendship Bread


Or: "How to Lose a Friend in 10 Days." 

Amish Friendship Bread has been around for quite some time, and it's become somewhat of a "love it or hate it" concept.  There several different (but still basically the same) recipes for Amish Friendship Bread floating around, but here's the general idea:

- You're given a baggie or container of yeasty, fermenting "starter" liquid
- The accompanying recipe comes with so many instructions/dire warnings that you begin to doubt whether or not you should be trusted with such a precious and finnicky "gift"
- Over the course of 10 days, you'll mix/mush/stir the liquid
- You "feed" the starter with additional ingredients twice during the 10 days
- At the end of the cycle, you divide up the starter and give portions of it away, keeping some for yourself--both to bake that day and to save to start another round

It's like a nasty little chain letter, and sooner or later you'll run out of friends who are willing to take on your Yeasty Little Beastie.  I've had to turn down accepting a starter twice now, but two weeks ago I was lucky enough to be given a baggie of starter as a "gift."  I couldn't exactly say no, so I kindly accepted and set the baggie on my desk for the rest of the work day.  More than once I peered out of the corner of my eye to spy on that bubbling bag of goo and make sure it didn't explode when I wasn't looking.  I'm not kidding.  This has happened to people.   As the starter ferments, the yeast produces carbon dioxide gas.  The starter bag expands as this happens, so every few days the bag needs to be opened to release some of the (very yeasty smelling) gas.

I'll admit--I was a bit (okay, a LOT bit) grossed out by the starter.  After all, it's a fermenting bag of flour, sugar, and MILK sitting on the counter for 10 days.  And if you take into account the starter you were given was made 10 days before from a starter that was made 10 days before, and so on, and so on...who knows how old that Bag 'o Goo is?  (Try not to think about that.)  It was a little off-putting, to say the least.  But...the concept has been around for ages, with starters being successfuly maintained and passed on for years between friends and family (think: sourdough).  As far as I know, there haven't been any *reported* deaths linked to the consumption of Amish Friendship Bread. 

[In case you're wondering: YES, it's safe.  The yeast consumes the sugar and lactose (milk sugar), producing carbon dioxide and lactic acid, which creates an acidic environment that's unfriendly to unwanted nasties and assorted critters.]

All kidding aside, the end result was pretty good.  Not knock-your-socks-off-this-was-totally-worth-the-ten-day-wait good, but still quite tasty.  It's sweet, moist, cinnamony, and faintly yeasty with the kind of flavor/richness you can't quite put your finger on--from the starter, of course.   Are you brave enough to try it?  I've posted the recipe below, along with a link to a recipe to make the top secret starter that supposedly ONLY the Amish know how to make.  Isn't the Internet a swell thing?


Recipe Notes:
  • I made mine in a Bundt pan because I discovered that my sparingly used loaf pans were rusty.  You could certainly make mini loaves as well. 
  • The recipe makes 2 standard loaves, so that you can give away slices of the finished bread along with the starter.  It does take some convincing for the uninitiated, so letting them sample the finished product goes a long way towards getting your friends to accept a baggie of starter.
  • If you want to maintain your own personal starter (i.e., you don't have any willing takers), you can adjust the recipe to make less starter.  On Days 6 and 10, simply add ½ cup of each ingredient instead of the larger amount called for in the recipe.  When all is said and done, you'll end up with three cups:  2 cups to bake with, and 1 cup to start the next round.
  • If you can't bake the bread on Day 10, stash the whole thing in the fridge to slow the fermentation to a near halt.  Don't refrigerate during your 10-day cycle though, because the yeast needs to be at room temperature to "do its thing."
  • Most Amish Friendship Bread recipes warn against freezing the starter, but I've done it successfully.  Freezing will put the yeast into hibernation, but shouldn't kill them off.  Simply thaw when ready to start the next 10-day cycle.
  • Yeast needs sugar.  Those bad boys eat sugar like no tomorrow, so don't be tempted to swap out the sugar with something crazy like Splenda®.  But...if you insist, then experiment with a 50/50 blend of Splenda® and sugar and go from there.
***If you haven't been given a starter, use THIS recipe to make one before continuing with the bread recipe below.  I've typed it out exactly from the copy I was given, with my notes in Italics.***


Amish Friendship Bread (makes 2 loaves or 1 Bundt)

- Do not use any type of metal spoon or measuring cup (no reason is given, but I presume it's due to the acidic nature of the starter.  You wouldn't want to keep your starter in a metal bowl, for instance)
Do not refrigerate (Don't refrigerate during the 10 day cycle, but you can hold the starter in the fridge if you can't bake on the 10th day)
If any air gets into the bag, let it out (I don't think it's really the air "getting in" as much the air/gas being produced that needs to be let out.  Still, press out as much air as you can before sealing up your zip top baggie)
- It is normal for the batter to rise and ferment

Day 1 - Do nothing.  This is the day you get your bag
Day 2 - Mush the bag (odd choice of verb here...I would've chosen "squish")
Day 3 - Mush the bag
Day 4 - Mush the bag
Day 5 - Mush the bag
Day 6 - Add to the bag: 1 cup sugar, 1 cup flour, 1 cup milk**  Mush the bag
Day 7 - Mush the bag
Day 8 - Mush the bag
Day 9 - Mush the bag
Day 10 - Pour entire contents into of bag into a non-metal bowl.  Add: 1½ cups flour, 1½ cups sugar, and 1½ cups milk**  Mix well.

Measure out 4 separate batters of 1 cup & put each into a gallon zip lock bag.  Make copies of the recipe.  Should the bags not be given to a friend on the 1st day, put the date on the zip lock bag.  Keep starter bag for yourself & you will bake every 10 days.  The bread is good & makes a great gift.  Only the Amish know how to make the starter so if you give them all away, you will have to wait until someone gives back to you again.  (not really.)

**If you're not interested in sharing the starter with your friends (how selfish!), add ½ cup of each ingredient on Day 6 and Day 10.


Cooking Instructions:
Preheat oven to 325°F & add the following to the remaining batter in the bowl: (there should be about 2 cups batter)
1 egg
1 cup oil
½ cup milk
1 cup sugar
2 tsp. cinnamon
1½ tsp. vanilla
1½ tsp. baking powder
½ tsp. baking soda
½ tsp. salt
2 cups flour
1 large box of instant vanilla pudding (5.1 oz or 6-serving size box)

Grease 2 large loaf pans.
Mix additional ½ cup sugar and 1½ tsp. cinnamon.
Dust the greased pans with half the mixture.
Pour the batter evenly into pans and sprinkle the remaining sugar/cinnamon mixture on top of batter.  Bake 1 hour.

NOTE:
You don't have to make it all in bread loaf pans.  Follow th same directions & use cupcake pans to make it crunchy all the way around.


Check back soon for more "Friendship" fun...