Wednesday, July 1, 2009

Happy Birthday, America!

What? No birthday cake? Cake is great and all, but there's not much (besides apple pie) that can top the all-American chocolate chip cookie for this occasion. Here's a super special chocolate chip cookie just for you, my fellow Americans. You want chocolate chips? You got 'em. White chocolate too? Okay. And sprinkles? Sure, why not? We ARE celebrating our Independence!

The quest for the perfect chocolate chip cookie recipe is neither new nor simple. Debates could go on for ages without ever reaching a consensus on what exactly constitutes chocolate chip cookie perfection. Chewy, gooey, crispy, cakey, puffy, chips, chunks, nuts, no nuts--the variations are endless. Where's a gal to start? For this experiment, I thought it might be best to stick with a basic recipe (i.e. the Nestlé Toll House® standard 'back of the bag" formula) and add a few tweaks. I also turned to the (not-so-top-secret) secret that's been causing quite a buzz in the food blogging world. It began with the famous New York Times article which reveals this simple tip: refrigerate your cookie dough for 24-36 hours before baking. (Hey, no one said it would be fast. Or easy.) Apparently this serves two purposes:
  1. It allows the flour plenty of time to hydrate, creating a better cookie texture
  2. It deepens and complexifies (I just made a new word, yay!) the flavors

Armed with two bags of chips and this handy dandy tip, I set off to baking (or rather, to prepping the dough for two days later) my cookies. Was it worth the wait? Did chilling the dough for 36 hours really produce insanely delicious and perfect cookies? You bet it did. It's difficult to describe exactly what about the flavor was different; I could only detect that it was somehow...better. It was definitely interesting to see what effect this method had on the Nestlé recipe because I seldom use it. Next time I'll revert to my go-to recipe and see what 36 hours in the fridge can do to improve it. I bet it will be Ah-maze-ing!


Festive Chip Cookies (Adapted from the classic Nestlé recipe)

  • 1 cup (2 sticks) butter, softened
  • ¾ cup brown sugar
  • ¾ cup granulated sugar
  • 1 tsp. salt
  • 2 eggs
  • 1½ Tbl. vanilla extract
  • 1 tsp. baking soda
  • 2¼ cups all-purpose flour
  • 1 cup semisweet chocolate chips
  • 1 cup white baking chips
  • 3 oz. multi colored jimmies (sprinkles)

Cream butter, brown sugar, and granulated sugar together until light and fluffy. Beat in salt, eggs (one at a time), and vanilla extract until creamy and incorporated. Gradually beat in flour and baking soda, beating only to combine. Stir in chips and sprinkles. Scoop out portions of dough. Cover and refrigerate for 24-36 hours.

Preheat oven to 375°F. Bake chilled dough for 11 to 13 minutes or until golden brown. Cool on baking sheets for 2 minutes; remove to wire racks to cool completely.

Recipe Notes:


  1. The original recipe yield is 5 dozen. I normally get between 4 and 4½ dozen because I like a bigger cookie. (Duh!)

  2. Use salted butter for this one. Many bakers use only unsalted butter in cookies, but since the original Toll House® recipe gives you the option of butter OR margarine (which is salted), I think the cookie can handle it. Besides, you almost need the salt to counter the extreme sweetness from the white baking chips.

  3. Yes, that really DOES say 1½ Tbl. As in "one and a half Tablespoons" of vanilla extract. It really boosts the flavor--but not so much that the vanilla smacks you in the face.

  4. I found it easier to scoop the dough before refrigerating rather than after, since 36 hours in the chill box will really harden it up. Just make sure you have a suitable container (and fridge space) in which to stash your dough balls for a day and a half. Also be sure to have some type of theft-deterrent device installed to ward off the raw cookie dough lovers in your household :)

  5. Why use 3 ounces of sprinkles? Isn't that just overkill? Ummm....no. One can never have "too many sprinkles." It's just an arbitrary amount I came up with--I threw in a whole tub of sprinkles, which happened to be a 3 oz. (about ½ cup) container. Use as many or as few as you'd like.

  6. And aren't sprinkles like, really expensive? Not if you check out the $1 section at Target!

Thursday, June 18, 2009

Peanut Butter Bars

Now that you've been drooling over the sea of chocolate chips and peanuts, calm that craving by whipping up a batch of peanut butter bars/brownies/cookies. Whatever you choose to call them, they'll be soft, chewy, and just durned good! Change it up by varying the toppings (peanut butter chips would be a most excellent addition) or cake mix flavor. I didn't use my usual brand of yellow cake mix for this batch, and I noticed that the flavor was "off" from what I was expecting. It tasted kinda...yellow. Next time I'll use a white or vanilla mix. Of course, I was the only one who picked up on it so maybe it was my imagination. Or my finely tuned, hypersensitive superpowers. :D


Peanut Butter Bars
  • 2 eggs
  • 1/3 cup oil
  • 1/2 cup peanut butter
  • 1/2 cup brown sugar
  • 2 Tbl. water
  • 1 tsp. vanilla extract (optional)
  • 18.25 oz. box cake mix (white, vanilla, or yellow)
  • 1 cup chocolate chips
  • 1/2 cup plain, unsalted peanuts

Preheat oven to 350°F. Line a 9x13" pan with foil and lightly grease. (I forgot to grease and they came out just fine.)

Mix eggs, oil, peanut butter, and brown sugar together until smooth and incorporated. Add water and vanilla extract, if using, and blend together. Vanilla extract is listed as optional because some peanut butter cookie purists out there insist that vanilla has no place in a 'proper' peanut butter cookie. I'm no purist. Go ahead and throw some vanilla in.

Spread batter evenly in greased pan. You may have to get your hands involved, as it's the easiest way to smooth out the batter. Sprinkle chocolate chips and peanuts on top. Press down ever so slightly or your chips and nuts will fall off the baked bar. Bake in a 350°F oven for 28-33 minutes, or until center tests done. Cool completely, then cut into small bars and serve! (Note: what you see pictured above is a double batch of this recipe made in my biggest cookie sheet, about 12x17".)

P.S. I learned a new word recently while perusing a cookie book published in England...SQUIDGY. What a perfect descriptor! Goodness, do I love that word. I think I might even describe myself as squidgy. :)

Monday, June 15, 2009

Peanut Butter Brownies

Looking for a quick way to dress up brownies made from a box mix using ingredients you probably already have on hand? If you're like me, you almost always have a stash of peanut butter in the pantry and leftover frosting in the fridge. How 'bout some peanut butter brownies? Bake up brownies as usual in a 9x13" pan--chewy or cakey, either will work. Use your favorite mix or make some from scratch. While brownies are cooling, mix together:
  • 1 cup peanut butter (I used creamy, but chunky would be good too)
  • 1/2 cup frosting (canned, homemade, vanilla, cream cheese--use whatever you've got!)

Spread the peanut butter mixture onto warm (but not hot) brownies. Cool completely. You can stop there and have perfectly acceptable peanut butter brownies, or you can mix up some chocolate glaze for the top. Melt together:

  • 4 oz. bittersweet chocolate
  • 3 oz. unsalted butter

Spread glaze on peanut butter layer. If the mood strikes you, top with some festive sprinkles before the glaze sets. Or better yet, top with peanut butter chips. Why didn't I think of that? Oh yeah. Didn't have any. Cut into smallish squares, as these can tend towards the rich side!

Snubbed by Pillsbury®

I love Pillsbury®. I love the company. I love the products. I have an unnatural obsession with their mascot "Poppin' Fresh" (aka "The Pillsbury Doughboy") and his trademark giggle. I even love their customer service team. In fact, I love Pillsbury® so much that whenever possible, I try to remember to include the ® symbol after the company name.
But I can't help but feel ignored. You see, I wrote to Pillsbury® via their online comment form but have yet to receive a response. It's been almost two weeks :( Big deal, you say? They never reply, you say? Oh, but they do! I have written in the past with a question and I actually got a reply. Not some generic form letter thanking me for my interest in their products. No sir-ee, it was a real, honest-to-goodness response. From a person. That actually addressed my question. How awesome is that!
My question this time was an inquiry about the change in formulation of their Funfetti™ brand frosting. Today's version is no more than their standard vanilla frosting (which, by the way, is very good as far as canned varieties go. It even comes in pink. Bonus!) with a sprinkle pack attached to the lid. "Back in the day" the sprinkles were mixed in. Now you might think this is no biggie, that I could simply mix the sprinkles in myself to recreate that effect...but I can't. Sprinkles bleed. Simple fact. The old mix-in sprinkles had a different, non-bleeding formulation. People were crazy about the older version. Why did they switch? My question about whether or not Pillsbury® plans to re-launch the original version is a valid one. Valid, but unanswered. I'm just going to assume they're "working on" a response so I can finally get some sleep :)
On to the cupcakes...

Pictured on the left above are red velvet cupcakes (made using my top secret recipe and Pillsbury® White Cake Mix, thank you very much) with vanilla bean cream cheese icing, which has firmly planted itself at the top of my favorite icings list. To the right you'll see what looks like Funfetti™ cupcakes, but aren't actually made with the named mix. I had to go with what was on hand and add sprinkles to make what I like to call "Fun-style" or "confetti" cupcakes so Poppin' Fresh won't come bustin' down my door with lawsuits. That would be pretty freaky.
Anyway, the confetti cupcakes are topped with... get ready for this... Betty Crocker® Rainbow Chip™ Icing. Scandalous, I know. You probably won't believe me, but that particular icing has a pretty crazy cult following. According to 'online people' it's a good replacement for the old style Funfetti™ icing. Never having tried it before, I decided to buy a tub and test it out. FAIL. That is some runny icing. By the next day the pretty cupcakes you see above didn't look so neat and tidy. I thought it was a fluke, that perhaps by some random stroke of fate I bought the one tub that didn't have the correct consistency. Until I saw the same goopy, drippy mess of icing atop some cupcakes at a party this weekend. In a different city 50 miles away. If that's how the icing's supposed to be, then you can keep it and I'll make my own, thanks.
Please, Pillsbury® e-mail answering people...won't you answer my call?

Why I Love Cook's Illustrated

New York Style Crumb Cake, aka Yum on a Plate. Soft. Buttery. Cinnamony. Crunchy. The perfect excuse to have cake for breakfast. Recipe is available for online members of Cook's Illustrated, but the more resourceful among us can find it floating about the interwebs with enough searching :D Good hunting!

Wednesday, June 3, 2009

Donkey Bars v.2.0

As promised, here is the second edition of the Donkey Bar. Fresh on the heels of my KAF Fudge Brownie "win!", I was optimistic about a successful outcome for these. Using the KAF recipe (see previous post) for the brownie base, I assembled in a 9x13" pan as follows:
  • Brownie batter
  • Cheesecake batter (same recipe as last time)
  • Refrigerated chocolate chip cookie dough (from a log)

I baked for 45 minutes, but they might have benefited from a full 50 minutes. When cooled, I topped with a glaze made by melting 4 oz. bittersweet chocolate with 2 oz. unsalted butter.

While the bars maintained definition in their layers, I STILL was not pleased with the result. Too...gooey. The brownie didn't rise, almost as if the weight of the other ingredients was too much for the structure to support. (No, I didn't forget baking powder this time!) It may have to do with using a "from scratch" brownie batter though. Topping it with so much other stuff was just tempting fate! I'm not sure if I should keep trying to perfect these, or if I should leave well enough alone and opt for simplicity. Plain brownies. Maybe with chocolate chunks. Or walnuts. But not both.

Monday, June 1, 2009

King Arthur's Fudge Brownies

Seriously. Ya gotta make these. The folks over at King Arthur Flour know their stuff when it comes to baking. They've even gone so far as to stamp their recipe for Fudge Brownies with a "KAF Guaranteed" label. Now that takes guts. Of course, there's no way the company can guarantee things won't go awry due to user error, so I won't fault them for my brownies not sporting that beautiful shiny top crust. Nor can I blame them for the brownies not delivering the perfect balance of fudgy and cakey. 'Cause you see, I messed up. Dull tops and dense fudginess can happen when:
  1. You don't follow directions very well for melting the sugar & butter
  2. You FORGET to add baking powder (oh snap!)

(I omitted the chocolate chips...that might've been overkill.) Were they tasty? You betcha. Would I make them again? You KNOW I will, because I'm stubborn like that and am determined to get results that "look like the picture!"

Friday, May 29, 2009

Buttermilk Biscuits

Mmmmm biscuits! Visit Christy Jordan's Southern Plate blog for a VERY handy tutorial on how to make your own buttermilk biscuits. Three ingredients. That's it! So easy, you just HAVE to make some for dinner tonight.

Thursday, May 28, 2009

Filet-O-Yum!


Ah, Filet-O-Fish®, how I love thee! My steady companion during Lent and quiet sidekick the rest of the year, you bring me both joy and sorrow. You are tasty, and yet you taunt me with your silly half-slice of cheese. Why, oh why, do you satisfy while leaving me yearning for that missing half of melty American cheese?

It's no surprise that I'm a big fan of this most delicious and unhealthy sandwich, so it's only fitting that I would try to memorialize it as a cake in honor of my co-worker's birthday. He is also quite the avid fan of Filet-O-Fish®, maybe even more so than I am!

Here's a breakdown of the components (from the top down):

  • Cream cheese icing
  • Cake baked in a shallow 2 qt. oven-proof bowl
  • "Tartar Sauce" made of icing and chopped green & white candy disks
  • Cream cheese icing
  • Uniced cake, baked in 9x13" pan, center cut out to fit
  • More icing
  • "Cheese" made from candy melt ganache*
  • Iced round 8" cake

*Chop 3 oz. orange candy disks and melt with about 1 Tbl. cream. Pour onto a parchment covered baking sheet and refrigerate. When nearly firm, cut out rectangle shape. Leave on parchment, but discard the excess trimmings. Put back in fridge until needed. When ready to assemble, invert the firm 'cheese' onto the iced bottom 'bun' and peel off parchment. As it reaches room temperature, it will soften and droop a bit. Cool!

Things to try next time:

  1. Use more batter in the bowl, and bake separately from other cakes. Glass browns baked goods more quickly than metal pans, so lower oven temp. by 25°F. Duh, I knew this but wasn't thinking.

  2. Make the bottom bun in a 9" round pan for a more proportional finished product. My filet overfloweth!

Donkey Bars v.1.0

The internet is a dangerous place. Especially if you're like me and browse food blogs during your lunch break. With so many sources for inspiration, it's hard not to be overcome by the dizzying array of goodies out there. Should I make brownies? How about chocolate chip cookies? Or cheesecake? I haven't made cheesecake in ages. I know! I'll MAKE THEM ALL. Thus was born the "donkey bar," so named for how absolutely redonkulous (yet tasty!) they are. They're not perfect by any means, since I simply mashed together four different things. Version 2.0 promises to be much more eye-appealing. Stay tuned!

Donkey Bars Adapted from The Internet

  • 1 box brownie mix (9x13" pan size), plus
  • eggs, oil, water called for on the box
  • 16 oz. cream cheese, softened
  • 2/3 cup sugar
  • 2 eggs
  • 2 tsp. vanilla extract
  • refrigerated chocolate chip cookie dough
  • 4 oz. bittersweet chocolate
  • 4 oz. unsalted butter (can use less)

Preheat oven to 350°F. Line a 9x13" pan with a foil or parchment paper sling (not vital, but will make life easier). Prepare brownie mix according to box directions. Spread into pan. For this round, I chose to follow the "cakey brownie" variation (which generally just means adding an extra egg) and swapped out half of the oil with applesauce...because I was feeling guilty about what I was about to create. And because I didn't want to chance an oil slick on my donkey bottoms. Next time I will probably not go for the cakey variation. Adding the extra egg made the brownie batter a bit too loose to hold the subsequent layers.

Blend cream cheese, sugar, eggs, and vanilla together until smooth. Try not to over beat. Carefully pour on top of brownie batter. Since my brownie batter was very liquidy, my cream cheese layer began swirling with the brownie layer upon contact. Which isn't a bad thing if you're making cheesecake swirled brownies, but I was aiming for defined layers.

Top cream cheese layer with chocolate chip cookie dough. Here's where I went wrong: First, I purchased the 'break and bake' squares. These were hard (duh, they need to be so you can break them apart) and didn't expand while baking. Second, I pushed them into the batter. For a nice chocolate chip cookie layer I suggest buying a softer dough log, slicing it, then laying it gently on top of the cream cheese.

Bake at 350°F until done. I didn't do a very good job of keeping track of how long this monster took to bake, but I would estimate somewhere between 40-50 minutes. Check your brownie box directions, then add some time onto that. You did just add two additional layers, after all. Use your judgement. I trust you :)

Cool completely. Then melt 4 oz. bittersweet chocolate with 4 oz. unsalted butter and spread over top of bars. I will use less butter next time to make top layer a bit more firm. Maybe 2 or 3 oz.? Either that or double the amount of chocolate. Haven't decided yet. Cut into small bars (at least 36-these are quite an experience!) once chocolate sets.

Feeling really ambitious? Make your own brownie batter and chocolate chip cookie dough. You'll need a brownie recipe written for a 9x13" pan and about 1 lb. of chocolate chip cookie dough.

Gelatin Overload

What could be better after a meal of boiled crawfish than a bowl full of light, refreshing gelatin to cleanse your palate? How about some fancy Jell-O? 'Cause why do something "regular" when you can do it "fancy?" And did I mention how much I love rainbows? Rainbows are, by nature, fancy. Some might say "tacky," but that's fine by me. This dessert walks that fine line.


Fancy Rainbow Jello Adapted from The Food Librarian
  • 5 (3 oz.) boxes gelatin in assorted colors
  • 5 cups boiling water, divided


The night before: Dissolve each box of gelatin separately in 1 cup of boiling water. Stir well to dissolve completely, about 2 minutes. Pour each flavor into its own container and refrigerate until firm. It is helpful to have some plastic resealable tubs for this, so you can stack them in your fridge.

Ingredients for the next day:

  • 4 envelopes unflavored gelatin (like Knox®)
  • 1 cup cold water
  • 1/2 cup sugar
  • 2-1/2 cups boiling water
  • 14 oz. can sweetened condensed milk
  • 14 oz. can coconut milk (regular or lite)

Sprinkle the unflavored gelatin over 1 cup of cold water in a medium-large bowl. (I used the metal bowl of my stand mixer for this) Let sit for a few minutes to allow the gelatin to absorb water and bloom. Add sugar and the 2-1/2 cups boiling water to the bloomed gelatin and stir to dissolve, about 2-3 minutes. Stir in sweetened condensed milk and coconut milk. Try not to lick the spoon. Set aside to cool while you:


Spray a 9x13" dish (a clear glass one gives you and your guests a sneak preview) with non-stick spray. Wipe down with a paper towel to distribute and absorb some of the spray. You don't want greasy jello!

Remove flavored gelatins from refrigerator and cube into smallish pieces, about 1/2". Layer into prepared baking dish. You can mix them if you'd like, but I didn't want to risk breaking any pieces and having mini rainbow shrapnel all over. Your choice. Make sure your gelatin-condensed milk-coconut milk mixture is close to room temperature, then pour over rainbow cubes in the 9x13" dish. (If the mixture is still hot or warm, wait a bit so you don't melt the already firmed gelatin cubes.) Stash the whole thing in the fridge and chill until firm. Cut into 1" pieces, smile, and enjoy!


F.A.Q.

1. Sure, it's pretty. But what does it taste like? Won't it taste bad with all those different flavors mixed?

Good question. It pretty much tastes like DELICIOUSNESS. And no, all those flavors don't taste bad together. Ever heard of fruit punch???

2. zOMG!?!?! Do you know bad for you this is?

Okay...so I know there are food purists out there who might be freaking out about the whole mess of artificial colors and flavors I've jammed into this one dessert. So before you shout, "I would never serve my child that much artificially colored/flavored food," I have three words for you: DON'T. MAKE. IT. No one's forcing you. And relax a bit, will ya? It's not like the rest of us plan to eat this every day.

3. But I hate coconut! Can I still make this?

Yes! Just use something else such as: milk, soy milk, evaporated milk (but it will be more off-white), half-and-half. Whatever floats your boat. Water would work too, but for the overall look of the dessert I would choose something opaque and whitish.

4. Hey wait a minute!?! You said you liked rainbows! Where's indigo and violet?

Oh...busted. Violet or "grape" jello will definitely make an appearance next time I make this. Maybe not indigo though. Sorry.

5. This takes too long! Who has the time to plan ahead and then cut up all that jello? Don't you have a life?

No. But thanks for reminding me :'(

Tuesday, May 12, 2009

Laissez Les Bons Temps Rouler!

It's crawfish season here in south Louisiana, and boy oh boy are the good times a rollin'. Last Friday our company sponsored a crawfish boil for its employees, and as usual I was eager to jump in with a dessert offering. With the memory of last year's pucker-inducing lemon cupcakes still burning in my mind, I was only after one thing: redemption.

Mini Lemon Cupcakes Yields about 5 dozen
  • 18.25 oz. box Betty Crocker® Lemon Cake Mix
  • 1/2 cup boiling water
  • 1 box (4-serving size) lemon gelatin
  • 1/2 cup (1 stick) butter, cut into 8 pieces
  • 8 oz. sour cream
  • 4 eggs
  • 1 tsp. lemon extract
Preheat oven to 350°F. Place paper liners into mini muffin pans.
Combine lemon gelatin and boiling water in a 1-cup glass measuring cup or bowl. Stir for 2 minutes to dissolve gelatin. Add butter pieces and stir until melted. (Clever trick alert! This cools down the gelatin mixture to a reasonable working temperature while simultaneously transforming the butter into a liquid state. Thermodynamics is kewl.) In a separate medium/largish bowl beat the eggs, sour cream, and lemon extract until blended. Add cake mix and gelatin/butter mixture. Blend on low speed for 30 seconds or so. Scrape bowl down, then increase mixer speed to medium and beat for another 2 minutes. Batter will be very thick.
Portion batter into paper-lined mini muffin tins and bake at 350°F for 12-15 minutes, or until cake tests done. Remove to wire racks to cool and repeat with remaining batter. Cool cupcakes completely before glazing with:
  • 1 can of ready-made lemon frosting
Heat frosting in microwaveable bowl for 10-15 seconds, until liquid. (Tips: Keep your eye on it while it heats, because the frosting melts almost instantly. Don't melt the whole can at once, because it will start to set up before you've had the chance to dip all the cupcakes. I worked with about 1/4 of the can at a time.) If desired, top cupcakes with a candy crawfish decor before the glaze sets up. You can find red candy coating disks at any craft/hobby store. I got my crawfish mold locally, but you can buy them from CK online (hint: they are normally labelled as "lobsters").


And the verdict? It's tough to say. Many of my co-workers began the day with intentions of "eating my weight in crawfish," leaving little room for dessert. Our dessert table was positively buckling under the weight of brownies, walnut brownies, lemon gooey butter cake bars, mini lemon cupcakes, aaaand... about 4 gallons of ice cream.

Monday, May 4, 2009

Lemon Poppy Crumble Cakes

They're crumb-diddly-umptious! So the crumb topping didn't work out as planned (I imagined the entire top would remain covered in crumbs during baking--I was wrong!) and the texture was more 'muffin' than 'cupcake', but who cares? Wait a minute!?!? Have I just invented the cupffin??? Or muffcake?


Lemon Poppy Crumb Cakes
  • 18.25 oz. box White Cake Mix (I used Betty Crocker®)
  • 3 eggs
  • 1/2 cup (1 stick) butter, melted
  • 8 oz. sour cream
  • 1 tsp. lemon extract
  • 1/3 cup fresh lemon juice
  • grated zest from one lemon
  • 1/4 cup poppy seeds
  • crumb topping, recipe below
Preheat oven to 350°F. Grease two 12-cup muffin pans or place paper liners in pans. Combine all ingredients except poppy seeds and crumb topping and blend on low speed for 30 seconds. Scrape bowl down, then increase mixer speed to medium and continue beating for 2 minutes. Blend in poppy seeds. Batter will be very thick.
Portion batter into 20-22 greased or paper-lined muffin cups and top with crumb topping. Bake at 350°F for 20-25 minutes, or until cake tests done and topping is lightly golden brown.
  • Crumb topping: recipe adapted from Smitten Kitchen
  • 1/2 cup (1 stick) unsalted butter, melted
  • 1/3 cup granulated sugar
  • 1/3 cup light brown sugar
  • 1/8 tsp. salt
  • 1-3/4 cups flour
  • grated zest of one lemon, optional
Combine melted butter, sugars, salt, and lemon zest in a medium bowl. Fold in flour. When cool enough to handle, use hands to break into pieces. This looks like a lot of crumbs, but they will cover the cupcakes nicely. (I rolled some of mine into balls but that ended up producing cupcakes that looked like more like something from Katamari Damacy! The cupffin/muffcake you see pictured above is the result of me breaking apart my crumb balls into jagged pieces after watching the first pan bake up very Bumble Ball-esque.)

Monday, April 20, 2009

Milk...please?


Make that a warm milk. Or not. The notion of drinking warm milk is unappealing to me. Cold milk in a Mickey Mouse-style footed cup might be good though :) It's 2:00 a.m. and I am wide awake, perched on the edge of a new work week and unable to get any rest after a week of vacation. Go figure. On the bright side, I can get this post out of the way and kick-start my week!

Choc-Oat-Chip Cookies A combo of this and this, and then some!
  • 2-3/4 cups all-purpose flour
  • 1 pkg. (4-serving size) instant vanilla pudding
  • 2 tsp. baking soda
  • 1/2 tsp. salt
  • 1 cup softened butter
  • 1-3/4 cups packed brown sugar
  • 1/2 cup granulated sugar
  • 1/2 cup applesauce
  • 3 eggs
  • 1 Tbl. vanilla extract
  • 12 oz. semi-sweet chocolate chips
  • 2-1/2 cups oatmeal (I used quick oats)
Preheat oven to 375°F. Combine flour, pudding powder, baking soda, and salt in a medium bowl and stir to evenly distribute ingredients. In a separate bowl, cream the butter and both sugars together until fluffy. Blend in applesauce. Add eggs, one a time, beating well after each addition. Stir in vanilla. Slowly incorporate flour mixture into creamed mixture. Stir in chocolate chips and oats by hand. Drop by tablespoons (I used a medium-sized cookie scoop) onto ungreased (I line mine with parchment or foil, just in case!) baking sheets and bake at 375°F for 9-11 minutes. Yields 6 dozen.

Monday, April 13, 2009

Tinkering with Sizes

Greetings, dear readers! It just occurred to me that I've been posting entries in an unnecessarily large font size. I'm sorry :( I will be switching over to this new, smaller font for future entries. Attempts to edit previous posts produces mixed results. As in some words are randomly large for no apparent reason. Blogger's been driving me crazy with that!

Sunday, April 12, 2009

Bringin' Back the Cupcakes...

... to work, that is. There has been a very noticeable drought in the appearance of home-baked goodies at work--primarily due to my declaration, "I'm not bringing anything in during Lent." Since Lent is over and the glorious Easter season is upon us, I spent yesterday (and some of today) working on something really special to bring in tomorrow. As always, one batch of cupcakes is never enough. Whether that's due to the number of employees we have or to greediness ("well I didn't try that flavor, so I gotta try both"), is unknown. In any case, I am glad to oblige because it presents the perfect opportunity to try out ideas I find on the Interweb.

Red velvet is always a hit around these parts, but I decided to step it up a notch by making a vanilla bean cream cheese icing to top it all off. Did I mention before that I've been working on a bottle of home-brewed vanilla extract? No? Well it's no surprise, because it's taken ONE YEAR to reach perfection. I've seen various sources that call for anywhere from 3 months to a full year. I decided to go whole hog. That's right--I've been keeping a bottle filled with vodka and chopped vanilla beans in my cupboard for that long, taking it out every few days to give it a gentle shake. My patience was definitely worth it. Wanna make your own? Click here. It's where I was inspired!


Now I realize that the background choice probably wasn't the best pick since it's so close to the cupcake color. BUT...this was all about the frosting! Which was deliciously speckled with vanilla bean seeds. That didn't photograph well. *sigh*


Easy Red Velvet Cupcakes

1 box (18.25 oz) Betty Crocker® Milk Chocolate Cake Mix
1.25 cups buttermilk (I used 1 Tbl. vinegar added to half-and-half for richness and extra YUM.)
1/2 cup (1 stick) butter, melted
1 oz. liquid red food coloring
3 eggs

Preheat oven to 350°F. Combine all ingredients and beat on low speed until moistened, about 30 seconds. Scrape down bowl, then increase mixer speed to medium and continue beating for 2 minutes. Portion into 24 paper-lined muffin pans and bake at 350°F for 20-25 minutes.

Vanilla Bean Cream Cheese Icing Adapted from iheartcuppycakes.com

1/2 cup unsalted butter, softened but still cool
1/2 cup salted butter, softened but still cool
4 cups (about 1 lb.) powdered sugar
1 tsp. vanilla extract
seeds from one vanilla bean (save empty pods to add to homemade extract or make vanilla sugar!)
8 oz. cream cheese, COLD--and not fat-free/low-fat either!

Beat butters on medium speed until blended. Add powdered sugar, one cup at a time, beating on low after each addition, until incorporated. Blend in extract and seeds. Cut cream cheese into 8 pieces and add to butter mixture. Mix on medium speed until smooth and combined. This shouldn't take very long. Don't over beat or the icing will be too soft. Which is fine if you don't plan on piping it.


In addition to the red velvet cupcakes, I decided to try out the popular chocolate chip cookie dough cupcake. Google it, and you'll find many interesting variations. Most recipes call for freezing a ball of cookie dough and plopping into a yellow or vanilla cupcake right before baking. The frozen dough doesn't really cook and stays pleasantly gooey and "cookie dough-y" Since I wasn't sure how well a cookie dough cupcake would go over at my work place, I decided not to freeze the cookie dough so it would bake through. And it worked! The perfect frosting complement? A brown sugar Swiss meringue buttercream using How to Eat a Cupcake's recipe. Absolute heaven!

I won't post a recipe here since I've already taken up too much space (and your time--thank you, loyal readers!). Use your favorite yellow or vanilla cake recipe along with your favorite chocolate chip cookie recipe. Don't tell, but I used a vanilla cake mix for the cupcake part. The cookie recipe came from the back of the yellow chocolate chip bag. You know which one ;) Roll dough into 1" balls and place in batter. I substituted mini chips because I wanted to make mini cookie toppers and regular chips would've been ugly. And we all know there's no room for ugly here at the Fuzzykoala Cake Company.

Saturday, April 11, 2009

You Can Has CUTE for Easter Too!

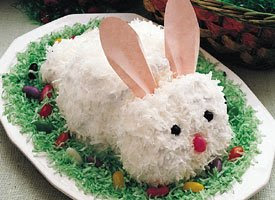
There has been one cake on my "to-bake" list for ages...the classic Betty Crocker Easter Bunny Cake. Every year for the past 5 years or so I eagerly look forward to Easter so that I have an occasion to make this little bugger. Yet for some reason every year I am struck by temporary memory loss when faced with the task of creating the Easter dessert. But not this year! No Sir-ee. It's been baked, decorated, photographed, AND posted. With plenty of time to spare. Now to rest up before Easter Vigil. Have a blessed Easter everyone!

The Original:
My attempt:
And a couple of impostors who look suspiciously like my bunny cake...
You know, I've gotta give my sister a whole mess of credit for me making the bunny cake this year since her Christmas gift of bunny slippers has been a daily reminder that I needed to do so!

Saturday, March 28, 2009

Just Couldn't Do It...

Yes, I baked. Even though I was trying my best not to bake during Lent. The craving for baking cannot. be. stopped. :) I decided to put some birthday money to good use and invested in a new Kitchen Aid hand mixer in the limited-edition Martha Stewart Signature Blue. Oh, how I love it! It's amazing the difference between my new hand mixer and my old one, which was acquired somewhere around 15 years ago. Wow, I really hold onto stuff! I am now also the proud owner of a set of jumbo muffin pans, which I hastily tested out in honor of my best friend Shelly's birthday:


Pictured above are jumbo lemon cupcakes with a lemon-vanilla buttercream and a "cherry" on top. It also features sprinkles AND non-pareils. It just doesn't get any more special than that! You wouldn't believe how difficult it was to come by cherry sour candies. Does no one carry these any more? After several fruitless grocery store and gas station searches, I called up my parents to see if their small-town grocery store stocked any. They didn't, but luckily my dad found some at a random gas station one night. My dad is awesome!

While I was at it, I whipped up some vanilla-coconut cupcakes with a lemony cream cheese frosting for my sister's work place. All in all, my first run with the jumbo pans went exceptionally well. Is bigger necessarily better? Maybe not, but I like the novelty of the idea. And I'm greedy. For cake.

*In case you're wondering, I got 12 jumbos where I would normally get 24 standards.

Sunday, February 15, 2009

Time for ValentiMes!

Happy Belated Valentine's Day everyone! This post is two weeks late, since I made these cuppies while (not) watching the Super Bowl. *Gasp!* I think something like the History Channel was on in the background. There's something about that narrator's voice that soothes me and puts me in "the zone" for decorating and assembling baked goodies.

So what do you think of my latest cavity-inducing creation? Such an effective use of sugar-on-sugar technology, is it not? Well make that sugar-on-sugar-on-sugar technology, if you count cupcake-frosting-cookie. My plan was to have the cookie on top as a removable edible decoration, but alas-- the cookie stuck so firmly to the frosting that attempts to dislodge it only resulted in the complete removal of frosting from the mini cupcake top. And a bare cupcake is a sad cupcake, so the logical solution to the problem was to take a giant bite of all three components. Sugar buzz, anyone?

Speaking of cavities, I just got the sweetest set of sparkly tooth earrings in from the talented Komodokat, a Houston-based artist. Check out her Etsy Store and buy something!

P.S. This was also the perfect opportunity to use up some of the mini cupcake liners my aunt so generously sent me. Thanks, Aunt B.! Love ya! :)

Sunday, February 1, 2009

Purists Beware...

Alright boys and girls, repeat after me: "There is nothing wrong with using boxed mix and canned frosting." That is, if done correctly. (You can stop scoffing at me now) Case in point: the coconut cupcake.

Could I have made this from scratch? Sure. But why take a chance on some recipe "from the Internet" when good ole' Betty has stood the test of time? From-scratch baking can produce (for some people, myself included) wonderful but sometimes unexpected results. Baking is, after all, an exact science. Do you only bake from scratch and love it? And never experience epic FAIL? Good for you. I envy you. 1,000 points and a high-five for ya! :)


Coconut Cupcakes
(Yields 21-24, depending on how generous you are. I was greedy with my batter scoop and only got 21. 24 can easily be had though.)
  • Cupcake:
  • 1 box Betty Crocker® White Cake Mix
  • 1-1/4 cups coconut milk
  • 3 eggs
  • 1/3 cup butter, melted
  • 1 tsp. coconut extract
  • 1/2 cup unsweetened coconut bits*
  • Frosting:
  • 1 tub Betty Crocker® Whipped Cream cheese icing
  • 8 oz. block cream cheese, softened
  • 1 tsp. vanilla extract
  • Sweetened Coconut flakes for top, if desired
* I used some I found in the natural snacks section of my local grocer, but frozen varieties are also available. You can also use the sweetened flaked kind, but keep in mind the texture will be coarser.

Preheat oven to 325°F and place paper baking cups into muffin tins. Combine all cupcake ingredients and blend on low speed for 30 seconds. Scrape bowl down, then turn mixer to medium speed and beat for 2 minutes. Portion batter into muffin tins Bake for 20-24 minutes, or until lightly golden brown and tests done. Cool completely before frosting.

For frosting, blend softened cream cheese with vanilla until well incorporated. Fold in tub of icing until combined. Frost cupcakes (you'll probably have some leftover), then top with coconut flakes if desired. And trust me, you DO desire. How much coconut? I started with a 7 oz. bag which claims to be 2-2/3 cups, and after topping 20 cupcakes I had maybe 2/3 cup left. You may use the whole bag if you make 24 cupcakes.

Saturday, January 31, 2009

Preparing for Global Domination...

...one cupcake at at time. Once again inspired by Vegan Cupcakes Take Over the World, I converted their basic chocolate cupcake recipe into a mini version for a take-along for last Sunday's Youth Group meeting. I used cake flour instead of all-purpose to give these sweeties a nice, soft crumb (minis can tend towards the dry side)--and these were perfect. Throw 1/4 cup of crushed Oreos® into a half-batch of their fluffy vegan buttercream, frost, then top with a mini cookie! Portable fun guaranteed to bring a smile to anyone's face! If the sight of a mini Oreo® cupcake doesn't make you happy, then you should go hug a puppy or a chubby baby :) No one deserves to be sad!

Stuck in a Magical Forest

It's a good thing I have some friends to keep me company :) My new-found obsession with sugar cookies prompted me to go on an online cookie cutter shopping spree, resulting in much joy and anticipation of putting them to good use. Where might one find such cutters, you ask? There are tons of online shops selling them, but I'm drawn to the smaller Mom and Pop operations. Check them out:

H.O. Foose Tinsmithing Co.


Country Kitchen Sweet Art (everything you could imagine for baking and decorating. My most favoritest place for supplies! Also where I purchased the ridiculously cute sugar eyes and jumbo heart sprinkles you see on the cookies above.)

I am deeply indebted to the Little Fox Factory for finally ending my 3-year long search for the classic, foot-free gingerbread boy cookie cutter! (you know, like "Gingey" from Shrek? ) I was so happy when I saw it for sale online that I stared at the computer screen in disbelief for a few minutes, but I was even more delighted when he arrived in my mail box. So cute! Straight legs AND a big head? Perfection. I can die in peace now. And stop lopping off the feet from the cookies made using my usual cutter.

Tuesday, January 20, 2009

"Hoo" Could Resist? Guess "Owl" Never Know!

*groan* :) These owl cupcakes are probably among the cutest things to ever emerge from my kitchen, no? My sister and I joined forces to bring these owls to life as both blondes and brunettes. It's only fair after all. Wanna make some? Find the instructions in the Hello, Cupcake! book I've ALREADY TOLD YOU TO GO BUY (see previous post). Do it now! You'll have a hoot! Sorry. ^_^Okay... one more, I promise. A word to the "wise": seek out other brands of chocolate sandwich cookies (as in, maybe not Oreos®), because the brand name ones, delicious though they may be, can be too fragile to separate successfully. The cookie is just too delicate and crumbly to remove in one piece! The Golden version of that same cookie? A dream to work with! Oh and go ahead and follow the book's recommendation of using Junior Mints® for the eye part. We used Milk Duds®, which were unfortunately kinda lumpy and misshapen. Which is fine if you're going for the crazy-eye look, but we weren't.

* If you really love owls and cheesy puns, go to Target and seek out a particular set of towels in their bed & bath section. They're hot pink, valentine-themed towels with owls appliqued on them. And the phrase "Owl love you forever" Awesome!


King Cake Season has Arrived!

Okay so they're not exactly king cakes...or even king cake flavored, but with their festive gold wrappers and drizzle, I think these cupcakes are perfect for ushering in the season. The icing base coat is made from (gasp!) canned frosting, which I zapped in the microwave for 15 seconds, transforming it into a luxuriously shiny glaze perfect for dipping. It's actually quite a neat trick I learned from the book Hello, Cupcake! Go pick up a copy, especially if you have kids. Or if you're a big kid at heart (like me!).

A Holiday Wedding

Exactly one month ago, I delivered this (my second actual wedding cake ever!) cake to my co-worker's house, where her sister's wedding ceremony and reception were held. I somehow managed to forget my camera that day, so this photo is courtesy of the bride! Being December 20th, the house was splendidly decorated for Christmas, and the wedding colors coordinated perfectly. The flavor? Red velvet, of course! The icing job didn't turn out as smooth as I would have liked, owing mostly to the crazy 90% humidity we had in Louisiana that weekend. Definitely not a white Christmas. But now, one month later, we're going to have a dry 30°F night. Go figure.

Sunday, January 4, 2009

Oh, Baby!

Maybe I'm blowing this out of proportion, but it seems like everyone I know is expecting. Is it something in the water? Or have I reached the age (yikes!) where the vast majority of my peers are getting married and starting families? Yeah...that's it. I'm still lovin' the cookie making, so this weekend I whipped up a batch to divide up and give out. The cookie itself is the same recipe as the chocolate cream cheese cookies I made earlier, except I used a total of 3.5 cups flour instead of flour and cocoa. Adjust flavorings to taste--this time I used vanilla and almond extracts, but lemon or coconut would be good too. If you haven't already, try out the recipe. It's a soft and creamy, not-too-sweet cookie with a cream cheese background. YuM!

Happy New Year!

Happy 2009, everyone! It's been a busy but wonderful year, hasn't it? Made/broken your resolutions yet? How about "eat more cookies?" That sounds like a good idea to me! Cookie making has made its way to the top of my interests as of late, and I am all the more happier for it. I had been waiting for my new Christmas cookie cutters to come in the mail, but sadly they did not arrive on my doorstep until December 26th. No worries, though--the Christmas season isn't really over until after Epiphany! Our church choir had a holiday party this past week, which gave me the perfect opportunity to test out my new cutters. Cute!


Chocolate Cream Cheese Cookies

* 1 cup butter, softened
* 8 oz. cream cheese, softened
* 1.5 cups sugar
* 0.5 tsp. salt
* 1 egg yolk
* 1 tsp. vanilla
* 2.75 cups flour
* 0.75 cups cocoa

Cream butter and cream cheese together, then slowly stream in sugar with mixer running. Beat until light and fluffy, then mix in salt, egg yolk, and vanilla until combined. Add flour and cocoa to creamed mixture in batches, beating just until combined after each addition. Divide dough into halves or thirds and roll out to 0.25" thickness between sheets of parchment or waxed paper (dough may be sticky). Refrigerate at least 2 hours (I do mine overnight) or until dough sheet is firm and easy to handle.

Preheat oven to 375°F. Cut out shapes with a floured cookie cutter, and place on parchment-lined cookie sheets at least one inch apart. (Dough holds its shape very well and will not spread into unrecognizable blobs) Bake in preheated oven for 8-12 minutes, depending on size of cookies. Cool on wire racks, then ice and decorate as desired.


Cookie Glaze

* 3 cups powdered sugar
* 4 Tbl. milk
* 4 Tbl. light corn syrup
* 0.5 tsp. vanilla or other flavoring, if desired

Mix powdered sugar and milk together until smooth and creamy (may take a few minutes). Blend in corn syrup and flavoring, then cover bowl with plastic wrap and let glaze sit for at least 15 minutes. During this time, the glaze will form small bubbles due to the mixing. These will slowly surface to the top, at which point you can gently stir them out. Stirring vigorously now will only make more bubbles... and you'll be sorry! Use an offset spatula to glaze cookies, or you can hold the cookie by its edges and dip them in glaze. Let set until dry and firm, which may take several hours depending on humidity.

Friday, December 26, 2008

It's the Most Wonderful Time of the Year...

Ah, Christmas...the joy, the time spent with family and friends, and THE BAKING. Holiday baking has got to be one of my all-time favorite past times (big surprise), and this year is no exception. Typically the Christmas season inspires me to make a multitude of cookie varieties, for the holidays are the perfect excuse to try out new recipes I've been eyeing. Still revved up from my sugar cookie-making high, I decided that decorated sugar cookies must be on my list this year. That and my favorite "top secret" gingerbread cookie recipe. I honestly thought I would save time by not doing my traditional cookie glaze/piped decorations, opting to go the buttercream and colored sugar sprinkles route. Wrong. The time commitment ended up being pretty much the same, with the added benefit (some might say downfall) of the cookies being a tad on the sweet side. Frosting AND sugar? Can we say overkill?

In keeping with the sugar-sprinkled theme, I topped my gingey boys with coarse sparkling sugar. This of course had nothing to do with the fact that I inadvertently omitted the brown sugar from the recipe, as evidenced by the discovery of my unopened carton of sugar while cleaning up :( They still turned out pretty good though, but not exactly like everyone remembered.
And last but certainly not least...FRUITCAKE. There seems to be two distinct camps regarding this much-maligned holiday treat: adore or detest, and no one on either side can comprehend how anyone can possibly stand on the other side of the fence. As for our family, we fall into the "adore it" category. This is my second crack at fruitcake, the first was using Alton Brown's recipe which calls for dried fruits in lieu of candied. Good? Yes. But not what we were looking for, so this year I happened upon a recipe in our local newspaper, and it was a hit at our family gathering. So there you have it, in all its rum-soaked, glowing neon fruity glory.


Sunday, December 14, 2008

"Mmm...Tastes Like Chicken Christmas"

You know, for a blog that's supposedly "Powered by Cupcakes" I sure haven't delivered on any as of late. But don't worry--I took care of that today:

May I present to you my "Rudolph Red Velvet Cupcake," complete with festive sprinkles and a handy mascot. Yes, I realize the picture's a bit blurry. And yes, I realize that's actually a plush moose with a BROWN nose...but you get the point. :) Perfect holiday flavor + best Christmas show ever = awesome!

Also making an appearance today are Eggnog Cupcakes, adorned with snow-capped candy Christmas trees (in homage to the rare bit of snowfall we got last week in Louisiana). Is it weird that while not a fan of actual eggnog, I absolutely adore all things eggnog-flavored? 'Cause these are delicious and pack a rummy-nutmeggy punch to boot!

Ummm... will you just look at those insane penguin toes up there?!?! Beyond cute.

Sunday, December 7, 2008

Mexico Bound

Our Church is holding a bake sale this weekend to help raise funds for our Easter mission trip to General Cepeda, Mexico...and of course I had to join in on the fun! I don't know about you, but I just love--no, make that LOVE--bake sales :) Pictured above are: (clockwise, from upper left) Brownie bites, Neapolitan Bundt cake, Marshmallow Krispie Treats, Pretzel Kisses, Lemon Bundts, Pretzel Hugs, and Eggnog Bundts. Yum!

It's Beginning to Look a Lot Like Christmas

Anyone who's ever been to my house between the months of November and January has seen the ridiculous spectacle of Christmas decorations my folks enjoy setting up. "Over the top" doesn't even begin to describe it, but thankfully this year my dad decided against putting up the colorful blinking light display on the exterior. Let's just say that we've become known as "the people with that Christmas House." Anyway, to help me get into the holiday mood, I decided to start some Christmas cookie baking. Above you'll see cranberry orange cookies, made with fresh cranberries that didn't make into the Thanksgiving sauce. Below are Rainbow Cookies (a.k.a. Spumoni Cookies), which sport maraschino cherry, chocolate, and pistachio layers. Very Christmasey :)

A Thanksgiving Feast...For the Eyes!

Holidays at my house usually means we'll be feasting an unusual mix of Vietnamese and classically American dishes. After all, what's Thanksgiving without my mom's crab & asparagus soup nestled against plates full of green bean casserole and cranberries? Most people eagerly look forward to trying to fit in that teeny little slice of pumpkin pie after stuffing themselves to the brim on the main meal--but us? We're Jell-O® folks through and through. Usually it's the "Crown Jewel" dessert (a spectacular mix of gelatin cubes suspended in a gelatin and Cool Whip® mousse, all encased in a ring of pound cake slices), but this year I decided to go with the "Rainbow Ribbon." Is it the shimmering layers of color or the mesmerizing soft wobbliness that intrigues me so? I think it's both.

Thursday, November 27, 2008

"Oh snap, he's about to eat that power pill!"

Yeah that's right--you guys better hurry up. I have been dreaming up an occasion to make these adorable cookies for some time now, because they're not exactly suited for any particular holiday. Halloween, maybe...because of the ghosts? The original (and quite famous, might I add) concept for these comes from the uber-creative mind behind the Snack or Die website, which features video game-related baked goods galore. Check it out if you're into that sort of thing :)

Friday, November 14, 2008

A Christmas Miracle???

Surely it must be, if I made these sammiches last night and I'm posting them the very next day! There's hope yet for me after all :) Compelled to bake 'n' post after procuring a new blog layout (which I'm absolutely IN LOVE with--Thanks, Delicious Design Studio!), I decided to see what I could whip up using ingredients I already had in my *shamefully* large baking supplies stash. Using my favorite cake mix-turned-cookie recipe, I converted a milk chocolate mix into some cute & chewy red velvet cookies and finished them off with a delectable cream cheese filling. Like an Oreo Cakester...but better!

Monday, November 10, 2008

And One for the Groom, Too!

My cousin married her high school sweet heart (awwwwwww!) this past Saturday, November 8th. Unforeseen circumstances brought the pleasure of making the groom's cake to my doorstep, and I was happy to take on the task. Two layers of dark chocolate cake encase a cookies and cream filling...my compliments to the bride and groom for selecting such an awesome flavor combo!

While I'm not normally a fan of the star fill-in method made popular by the Wilton school of cake decorating, I found that it was the quickest and albeit cutest way to represent "grass" in butter cream. (Oh, and can we say, "green and black mouths?" It takes crazy ridiculous amounts of food coloring to achieve those shades, even using my uber-black Americolor Super Black gel. For deep colors like black, red, blue, and green Americolor can't be beat! Make the switch from Wilton and you won't believe how it will change your life. Okay, so maybe it's not life-changing, but it will certainly make your decorating a breeze!) The fleur de lis, lettering, numbers, and gazillion tick marks were piped a few days before using royal icing. Thank goodness for proper planning!

Here's the cake set up at the reception hall: